Table of Contents
Using Canon EOS Utility To Step Focus
Canon EOS Utility is camera support software that comes bundled with every Canon DSLR. One thing it can do is to control auto-focus lenses so that you can shoot a focus stack very precisely through a graphical user interface on your computer. The function is simple to use but not obvious. This tutorial is intended to be a recipe and quick-start guide.
Just The Recipe
In brief, here's what you do:
- Set camera lens to Automatic Focus mode.
- Connect camera to computer with a USB cable and turn it on.
- If Windows offers to run other programs, hit Cancel.
- Probably Canon EOS Utility will run automatically. If it does not, then launch it manually.
- Press the Live View button on the camera.
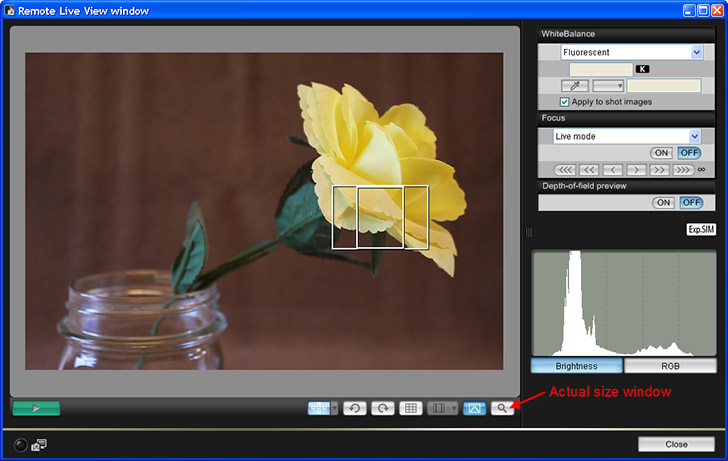
- Press “Remote Live View Shooting” button in Canon EOS Utility. The current Live View image will be displayed on the computer screen.
- Illuminate, compose, and frame your subject.
- Press the “Actual size window” button to bring up the “Zoom View” window.
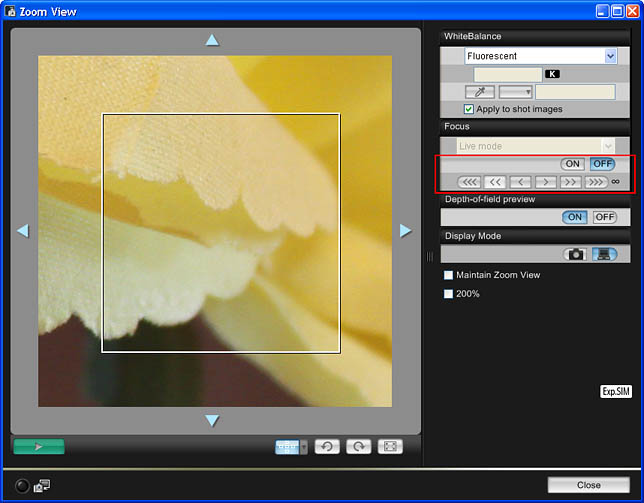
- If necessary, click the buttons to turn OFF auto focus (in the Focus panel) and to turn ON the Depth-of-field preview.
- Press the “< < <”, “< <”, “<”, “>”, “> >”, and “> > >” buttons to place lens focus at one end of your stack and to decide how many presses of each button are needed to make an appropriate step size.
- Press the capture button in the main window to take a picture.
- Alternately press focus and capture buttons to take more pictures, until you can see that the capture is done.
The Illustrated Cookbook
Here is the setup we'll be working with:
Now, spelling out the steps in more detail…
- Install Canon EOS Utility from the CD that came bundled with your camera.
- Set the camera lens to Automatic Focus mode.
- Connect camera to computer with a USB cable and turn it on.
- If Windows offers to run other programs, hit Cancel.
- Probably Canon EOS Utility will run automatically. If it does not, then launch it manually.
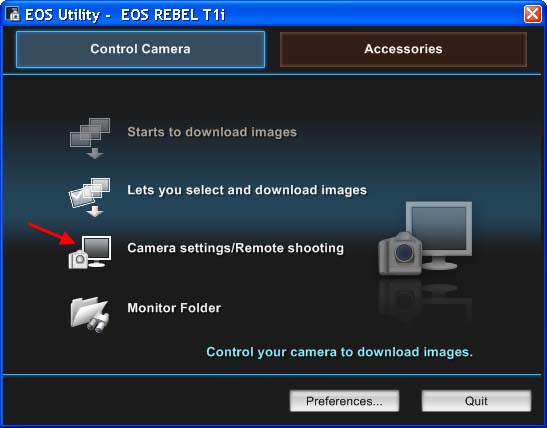
- If Canon EOS Utility opens into the Main Window, then select the Camera Settings / Remote Shooting option to bring up the camera controls window.
Main window:
Camera controls window:
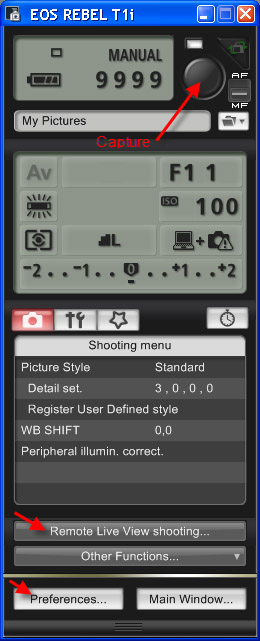
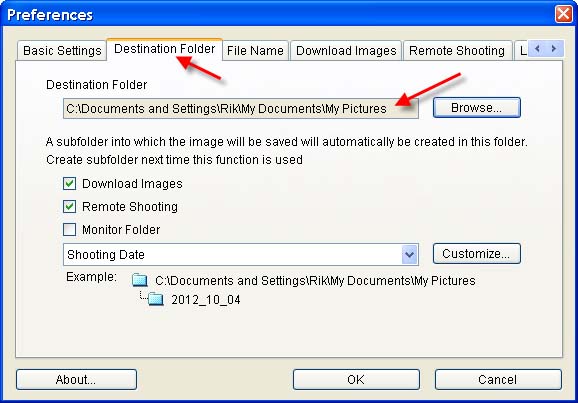
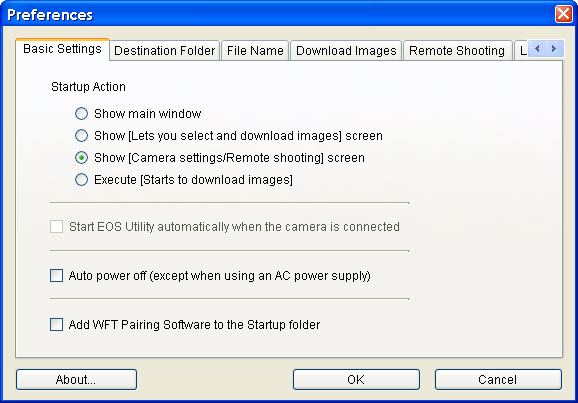
- In the camera controls window, press the Preferences button. In the preferences window select the Destination Folder tab and either set an appropriate location or at least make sure you know the current location. In the Basic Settings tab, you can also request that Canon EOS Utility start up showing the Camera Settings / Remote Shooting window, and whether to start EOS Utility automatically when the camera is connected and powered on.
Destination Folder tab in preferences window.
Basic Settings tab
- Press OK to dismiss the Preferences window.
- If your camera offers a combined “Stills+movie” mode for Live View, switch it to “Stills only” in the camera's Menu settings. Otherwise, depth-of-field preview may not work correctly with the EOS Utility.
- Press the Live View button on the camera. This causes the camera to go into Live View mode, showing its display on its own screen.
- Press “Remote Live View Shooting” button in Canon EOS Utility. The current Live View image will be displayed on the computer screen also.
- Illuminate, compose, and frame your subject.
- Press the “Actual size window” button to bring up the Zoom View window.
- If necessary, click the buttons in the Zoom View window to turn OFF auto focus (in the Focus panel) and to turn ON the Depth-of-field preview.
- Press the focus buttons “< < <”, “< <”, “<”, “>”, “> >”, and “> > >” to place lens focus at one end of your stack and to decide how many presses of each button are needed to make an appropriate step size. Typically one or two presses of the “< <” or “> >” buttons will be appropriate. In rare cases you may need to use the “<” and “>” buttons. These make movements that are roughly ten times finer than “< <” and “> >”.
- Press the capture button in the camera controls window to take a picture.
- Alternately press focus and capture buttons to take more pictures, until you can see that the capture is done.
- When finished shooting, turn off Live View to conserve battery power in the camera.
